How To Add Payment?

Recording payments received for generated invoices is crucial for maintaining accurate financial records and tracking outstanding balances. This guide outlines the simple steps to enter payments within the Sales Module, enabling you to efficiently manage your accounts receivable and ensure timely reconciliation of transactions.
Enter Payment Details
Accessing the Invoice Section
Open the Sales Module of your system.
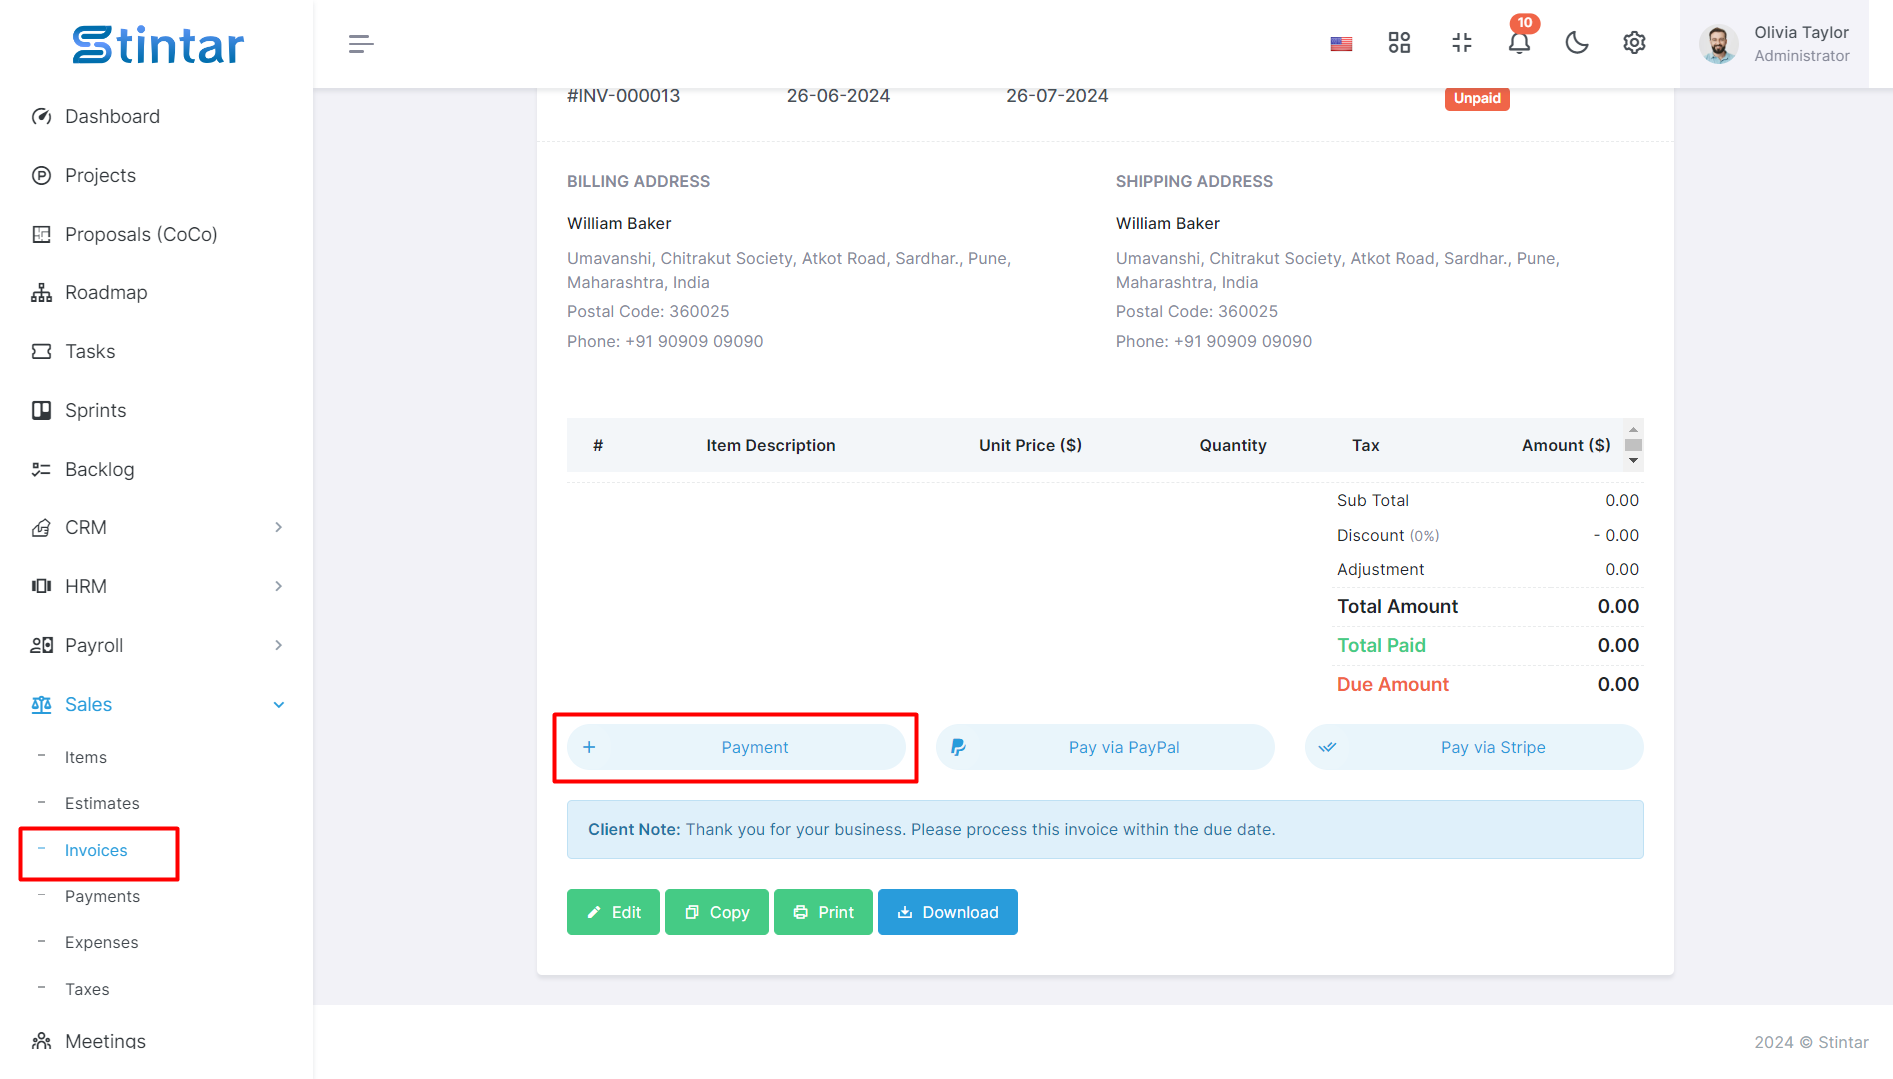
Navigate to the invoice section, typically found in the main menu or sidebar.
Viewing and Editing the Invoice
Locate the invoice for which you have received payment by its ID or other identifying information.
Click on the invoice ID to view its details.
If necessary, you can edit the invoice before entering the payment.
Entering Payment Details
Within the invoice details view, look for the option to record payment, usually labeled as "Payment."
Click on the "Payment" button to initiate the payment creation process.
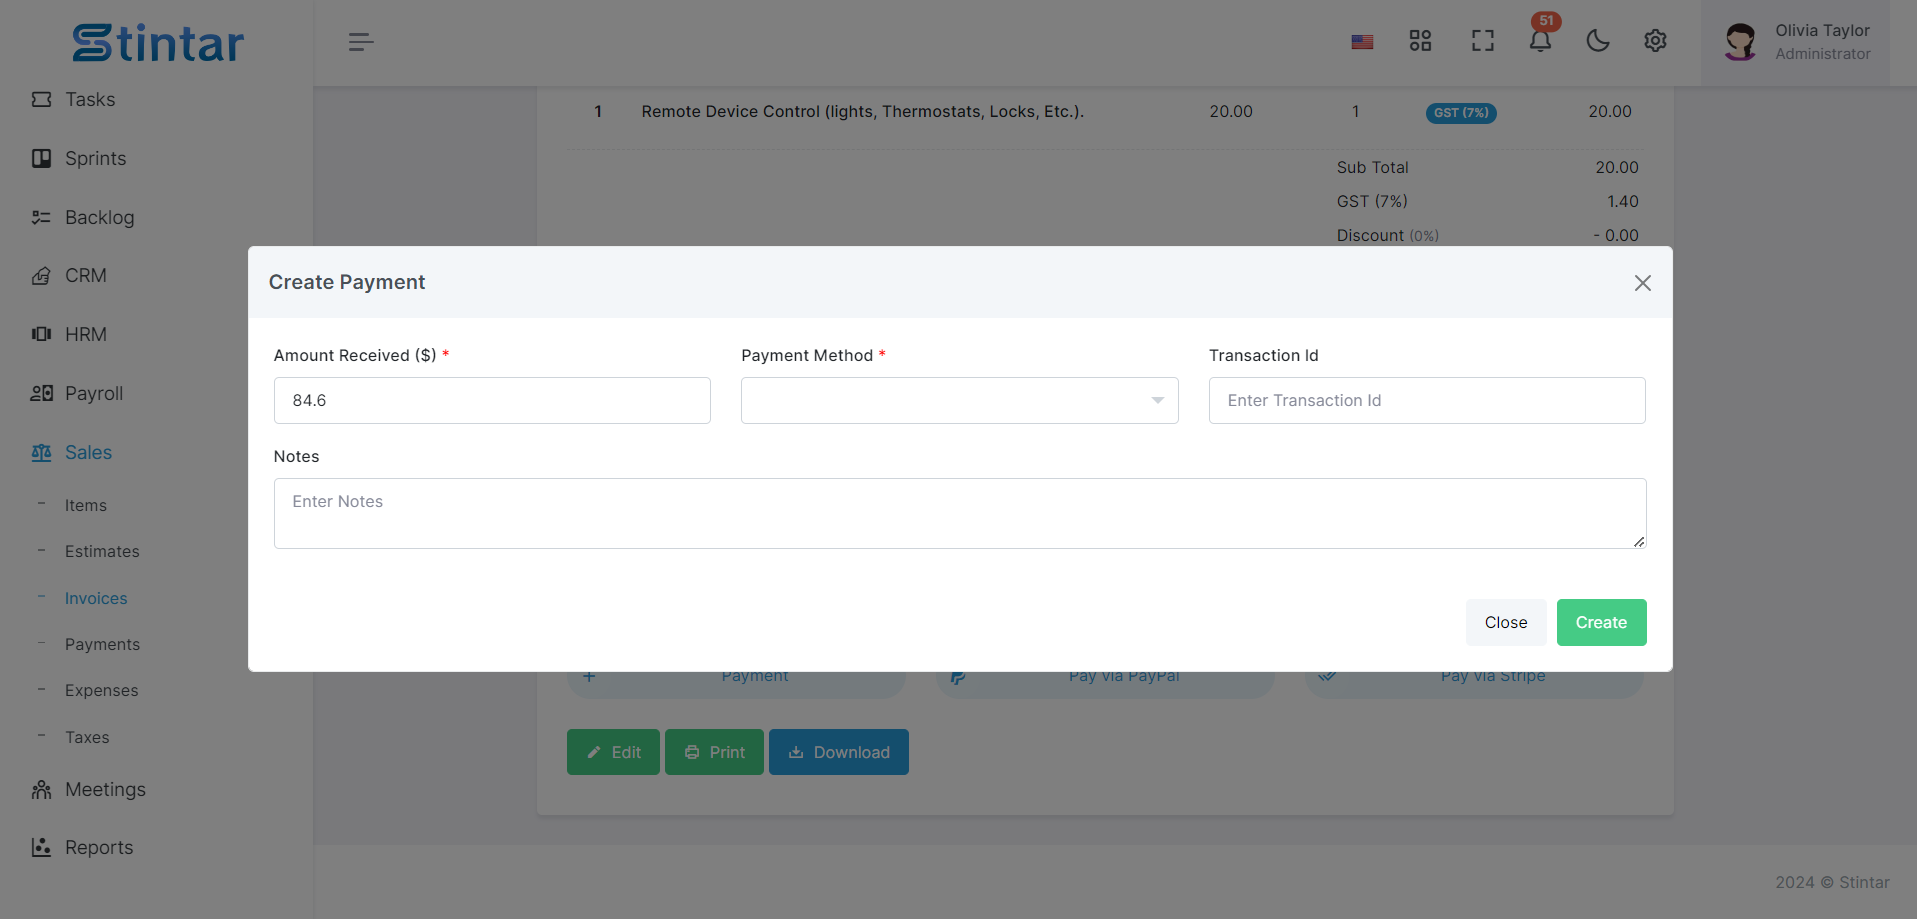
You will be redirected to the payment creation form.
Payment Creation Form
Filling out the Payment Creation Form
Amount Received
Enter the amount received from the customer.
Payment Method
Select the method of payment used by the customer (e.g., paypal, offline).
Transaction ID
If applicable, enter the transaction ID associated with the payment.
Description
Optionally, provide a brief description or note related to the payment.
Saving the Payment
Review the payment details for accuracy.
Click on the "Create" or "Save" button to add the received payment to the system.
Review the payment details for accuracy.
Click on the "Create" or "Save" button to add the received payment to the system.
Updating Invoice Status
Once the payment is recorded successfully, the status of the invoice will automatically change from "Unpaid" to "Paid."
This status update reflects the receipt of payment against the respective invoice.
Once the payment is recorded successfully, the status of the invoice will automatically change from "Unpaid" to "Paid."
This status update reflects the receipt of payment against the respective invoice.
Managing Invoices
After recording the payment, you can continue to manage the invoice as needed.
From the invoice details view, you can edit, download, or delete the invoice.
After recording the payment, you can continue to manage the invoice as needed.
From the invoice details view, you can edit, download, or delete the invoice.
By following these straightforward steps, you can efficiently record payments received for invoices within your Sales Module. This process ensures accurate tracking of financial transactions, facilitates timely reconciliation, and helps maintain transparent communication with clients regarding outstanding balances.

