How To Create A Lead?

Managing leads efficiently is crucial for successful business operations. Stintar simplifies this process, offering user-friendly features to streamline lead creation. Here's a quick guide to get you started:
Method 1: Importing Leads from Excel
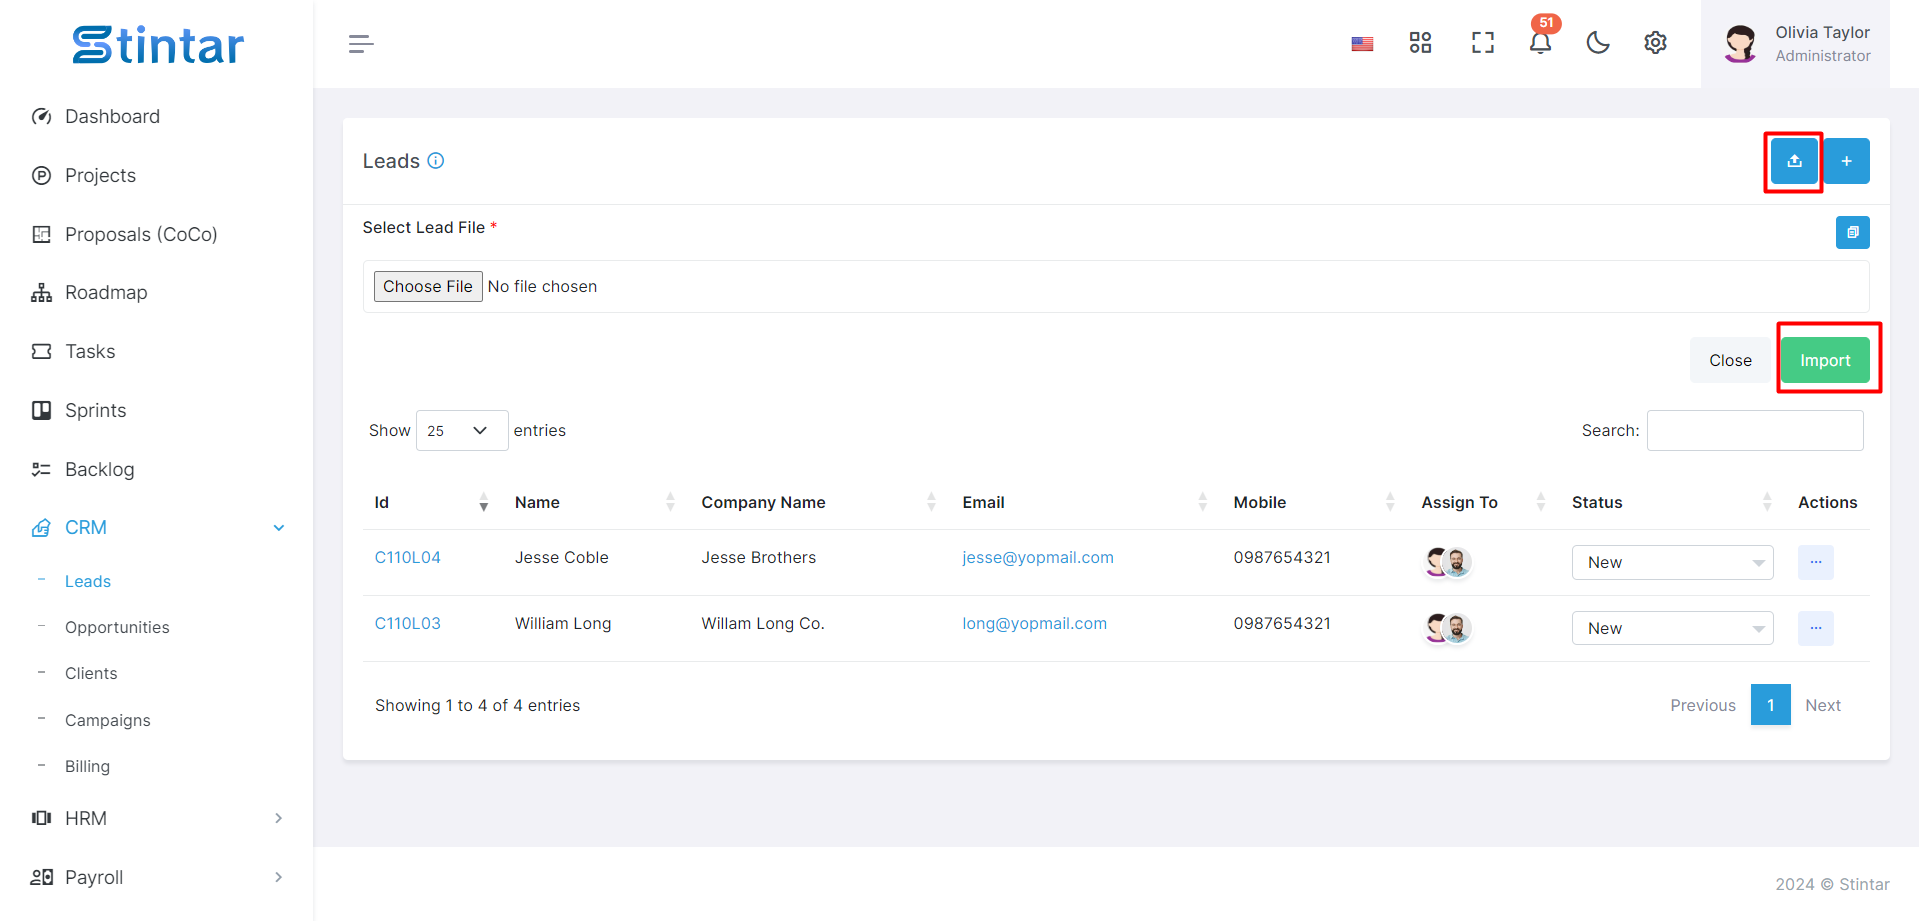
To expedite the lead creation process, Stintar allows you to import leads directly from an Excel file. Ensure your file contains all relevant lead information, such as name, email, company name, mobile number, lead source, customer group, assigned to, address, and description. Follow these steps:
Navigate to the import section in Stintar.
Tap on Import Icon on the Right side given on Lead Module
Select the Excel file with lead data.
Import the Excel file from local library
Map the fields correctly to match Stintar requirements.
Confirm and initiate the import process.
Method 2: Creating a New Lead Manually:

For individualized lead entries or when Excel import isn't feasible, Stintar provides a simple interface for manual lead creation. Follow these steps:
Access the Lead Module:
You can use the left sidebar of the screen.
Click on the “Leads'' module in CRM Module To open a Lead listing.
Initiate Lead Creation:
Within the Leads page, find the "+Create" button.
Clicking on this button will lead you to a dedicated page for creating a new lead.
Lead Creation Form:
This form is designed to capture essential details for effective Lead management.
Lead Creation Form
Here you can see Lead creation form and Fill in the required details for the lead:
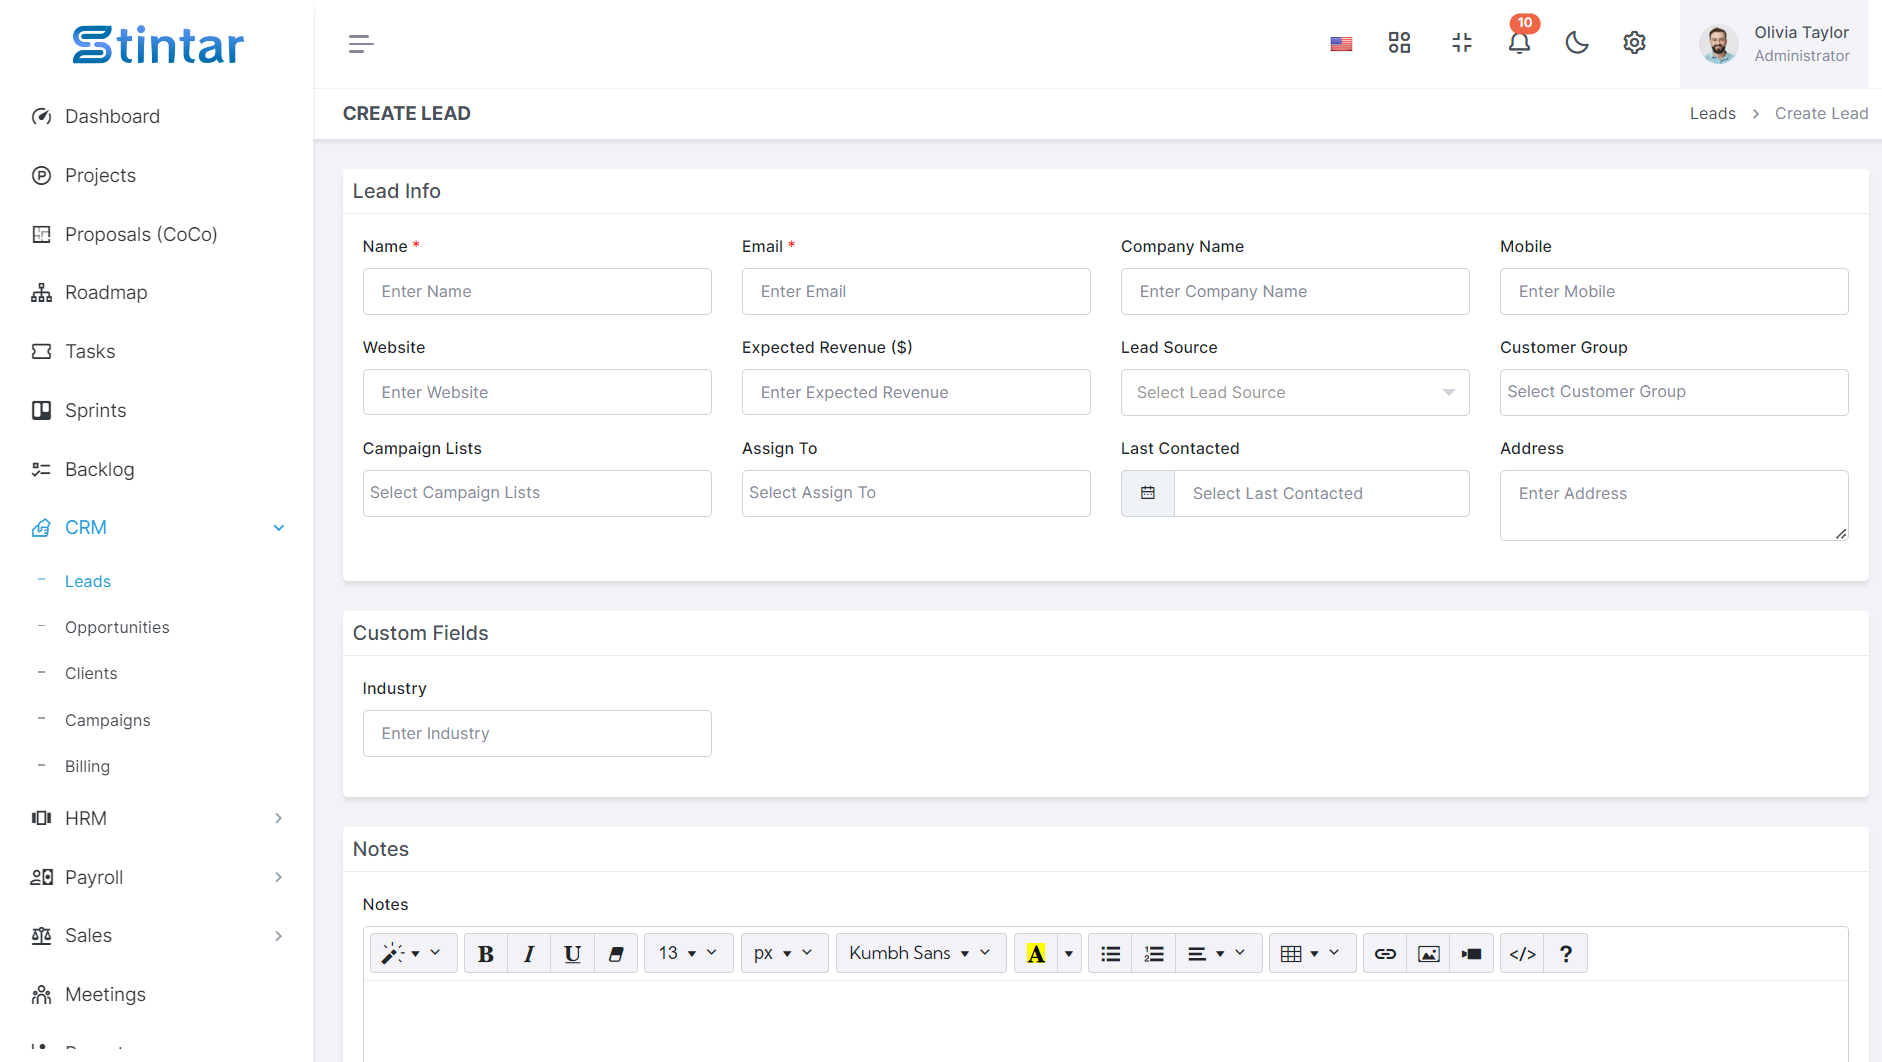
Name
Enter the lead's full name, providing a personal touch and facilitating easy identification.
Email
Provide the lead's email address, a crucial contact point for communication.
Company Name
Specify the company the lead is associated with, offering valuable context for future interactions.
Mobile Number
Include the lead's mobile number, another key communication channel.
Website
Add the lead’s website details for more details.
Lead Source
Indicate where the lead originated, be it through email correspondence or Facebook interactions.
You can add lead source from Lead Settings given in Settings Module.
Customer Group
Categorize the lead into a specific customer group, aiding in targeted marketing efforts.
You can add Customer group names from the Settings Module in Stintar.
Campaigns List
You can add Campaigns list names from the Settings Module in Stintar.
Assigned To
Designate a team member responsible for managing this lead, ensuring accountability within your team.
Address
Input the lead's address, providing a comprehensive view of their location.
Notes
Include any additional details or notes about the lead, enhancing your understanding of their needs and preferences.
Custom Fields
You can also add custom fields to Leads listing page if other data is required and you can add the field from the Settings Module.