How To Create A Project?

Learn the step-by-step process of creating a project, from initiation to task delegation, with our comprehensive guide on project creation. Let’s take a look at how you can create a project.
Method 1: Dashboard Page

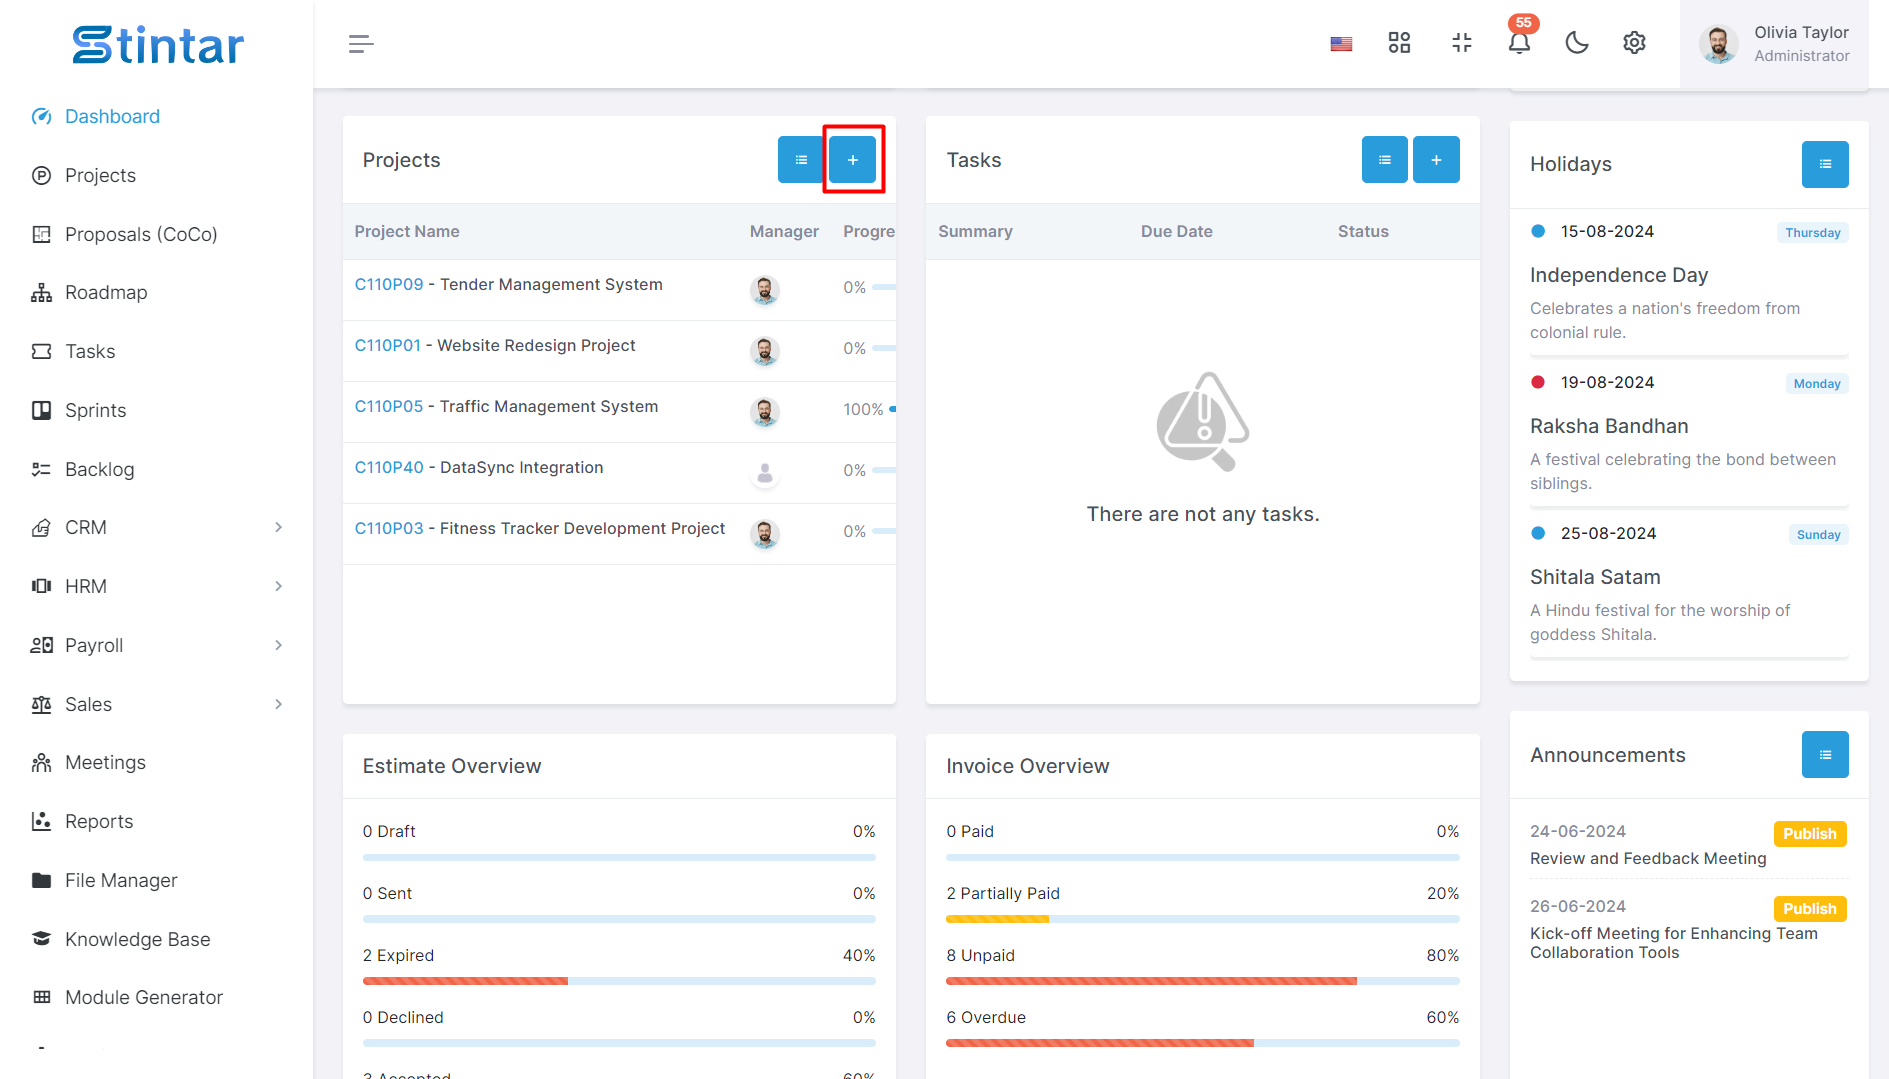
Navigate to the Dashboard Page
Access the platform and log in to your account.
On the landing page, you'll encounter the Dashboard. This centralised hub offers an overview of your activities.
Locate the Project Create Button
Within the Dashboard, identify the "Project Create" button.
A single click on this button will lead you to a dedicated page for project creation.
Method 2: Projects Module
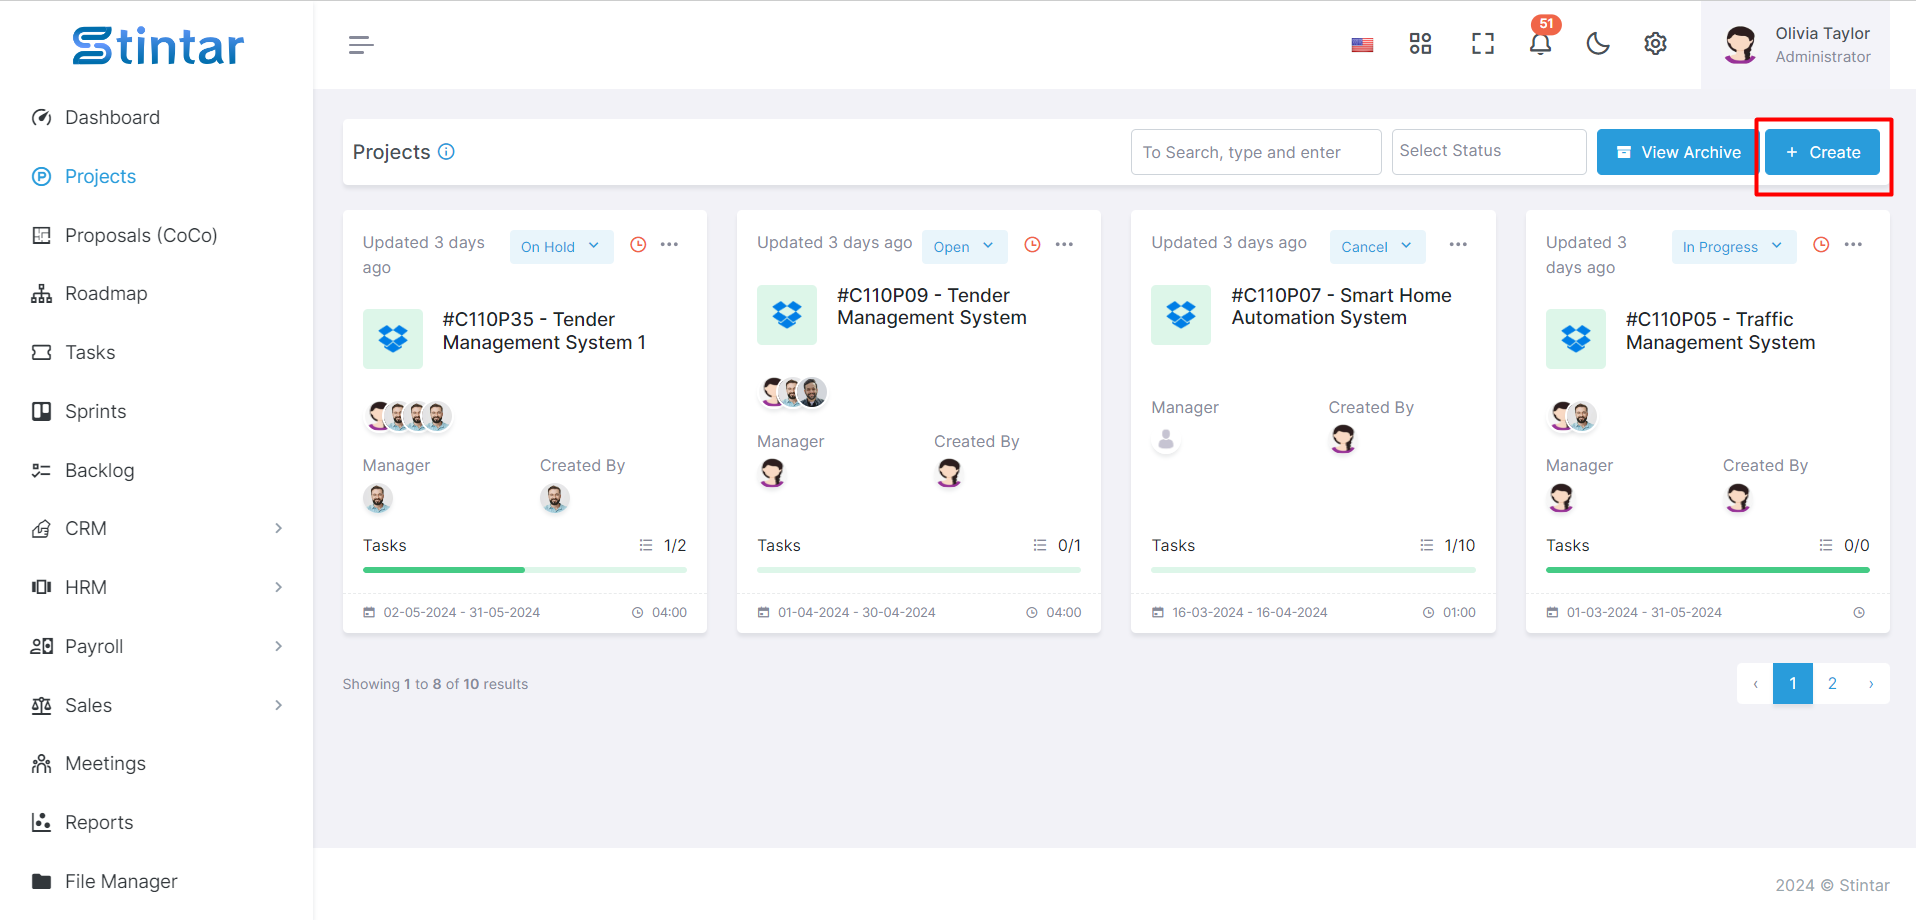
Click the ‘Projects‘ module at the left sidebar of the screen

Access the Projects Module
Alternatively, you can use the left sidebar of the screen.
Click on the 'Projects' module to open a project listing.
Initiate Project Creation
Within the Projects page, find the "+Create" button.
Clicking on this button will lead you to a dedicated page for creating a new project.
Project Create Form
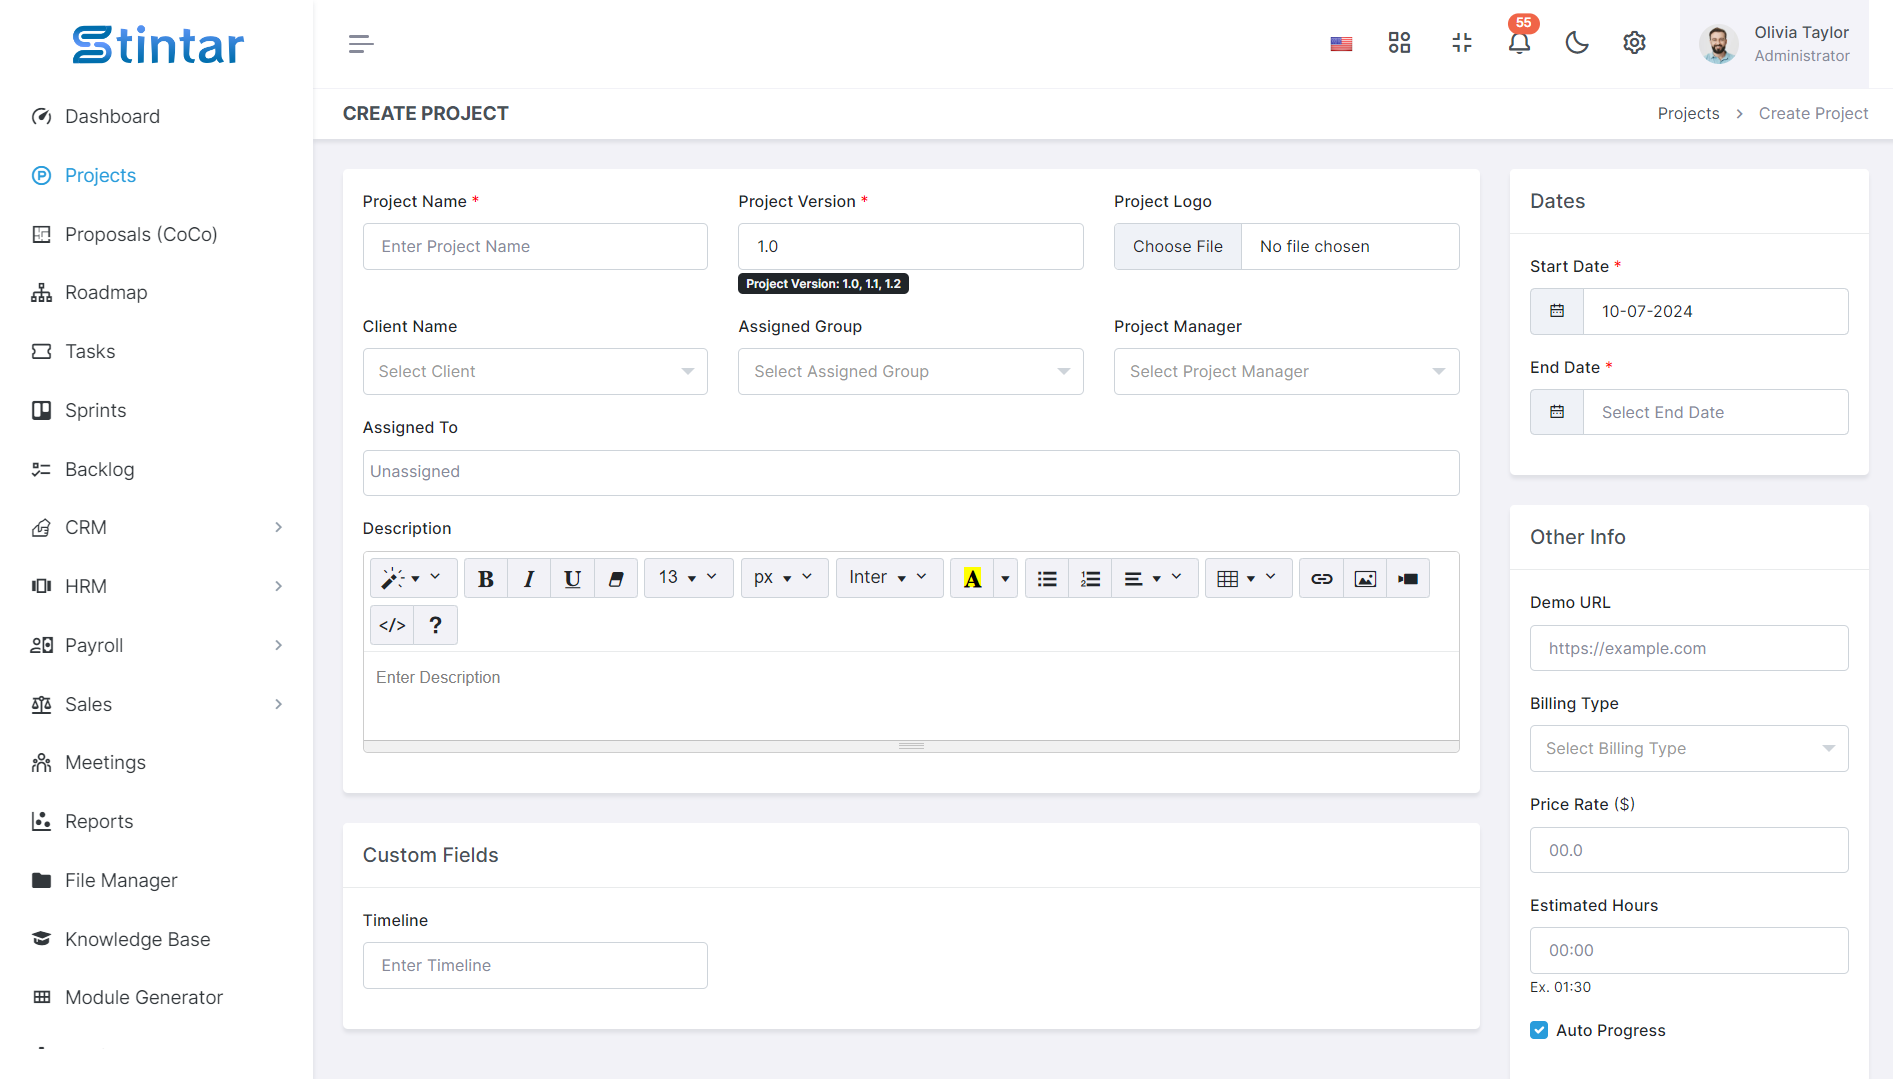
Regardless of the method chosen, you'll be directed to a comprehensive Project Create Form.
This form is designed to capture essential details for effective project management.
Project Create Form
Here You can see the create form.

Project Name
Efficiently name and organise your projects for seamless tracking and management.
Project Version
Keep track of project versions to monitor updates and changes over time.
Project Logo
Personalise your projects with unique logos for easy identification and branding.
Client Name
Associate clients with projects to maintain clear and organised client-project relationships.
You can create a Client into a Client Module.
Assigned Group
Efficiently allocate tasks by assigning them to specific groups within your project.
You can create a Group into a Team Module.
Project Manager
Designate project leaders for effective coordination and leadership.
You can select any one of the selected group members from the Assigned Group as the project manager.
Assign To
Easily assign tasks and responsibilities to team members for streamlined collaboration.
You can select any one or more of the selected group members from the Assigned Group as the assign to.
Description
Provide comprehensive project details and context with descriptive information.
Start Date
Specify project initiation dates for accurate timeline tracking.
End Date
Set project completion dates to monitor and meet deadlines effectively.
Demo URL
Include demo URLs for showcasing project progress or features.
Billing Type
Define billing methods, ensuring accurate financial tracking for your project.
Price Rate
Set price rates to calculate project costs and manage financial aspects efficiently.
Estimated Hours
Plan and track project timelines with estimated hours for each task.
Auto Progress
Enable automated progress tracking to effortlessly monitor project advancement.
Custom Fields
A user-defined identifier for a specialised input field in a form or application, allowing unique identification and customization.
Label
The descriptive title or name assigned to a specific input field, providing users with information about the expected data.
Help Text
Supplementary information or guidance associated with the input field, offering users clarification or instructions on how to complete the form or provide accurate data.
Required
Indicates whether the input field must be filled out by the user to successfully submit the form, ensuring essential information is provided.
Type
Specifies the data format or input method expected for the field, such as text, numeric, textarea, select, checkbox and date data types, facilitating accurate data entry and processing.
Your new project has been created.You can now view your created project on the Project Listing page.