How To Create Items?

Creating items in your sales module is a fundamental aspect of managing your inventory and facilitating transactions. This guide will walk you through the simple process of adding items to your inventory, ensuring accuracy and efficiency in your business operations.
Create Items

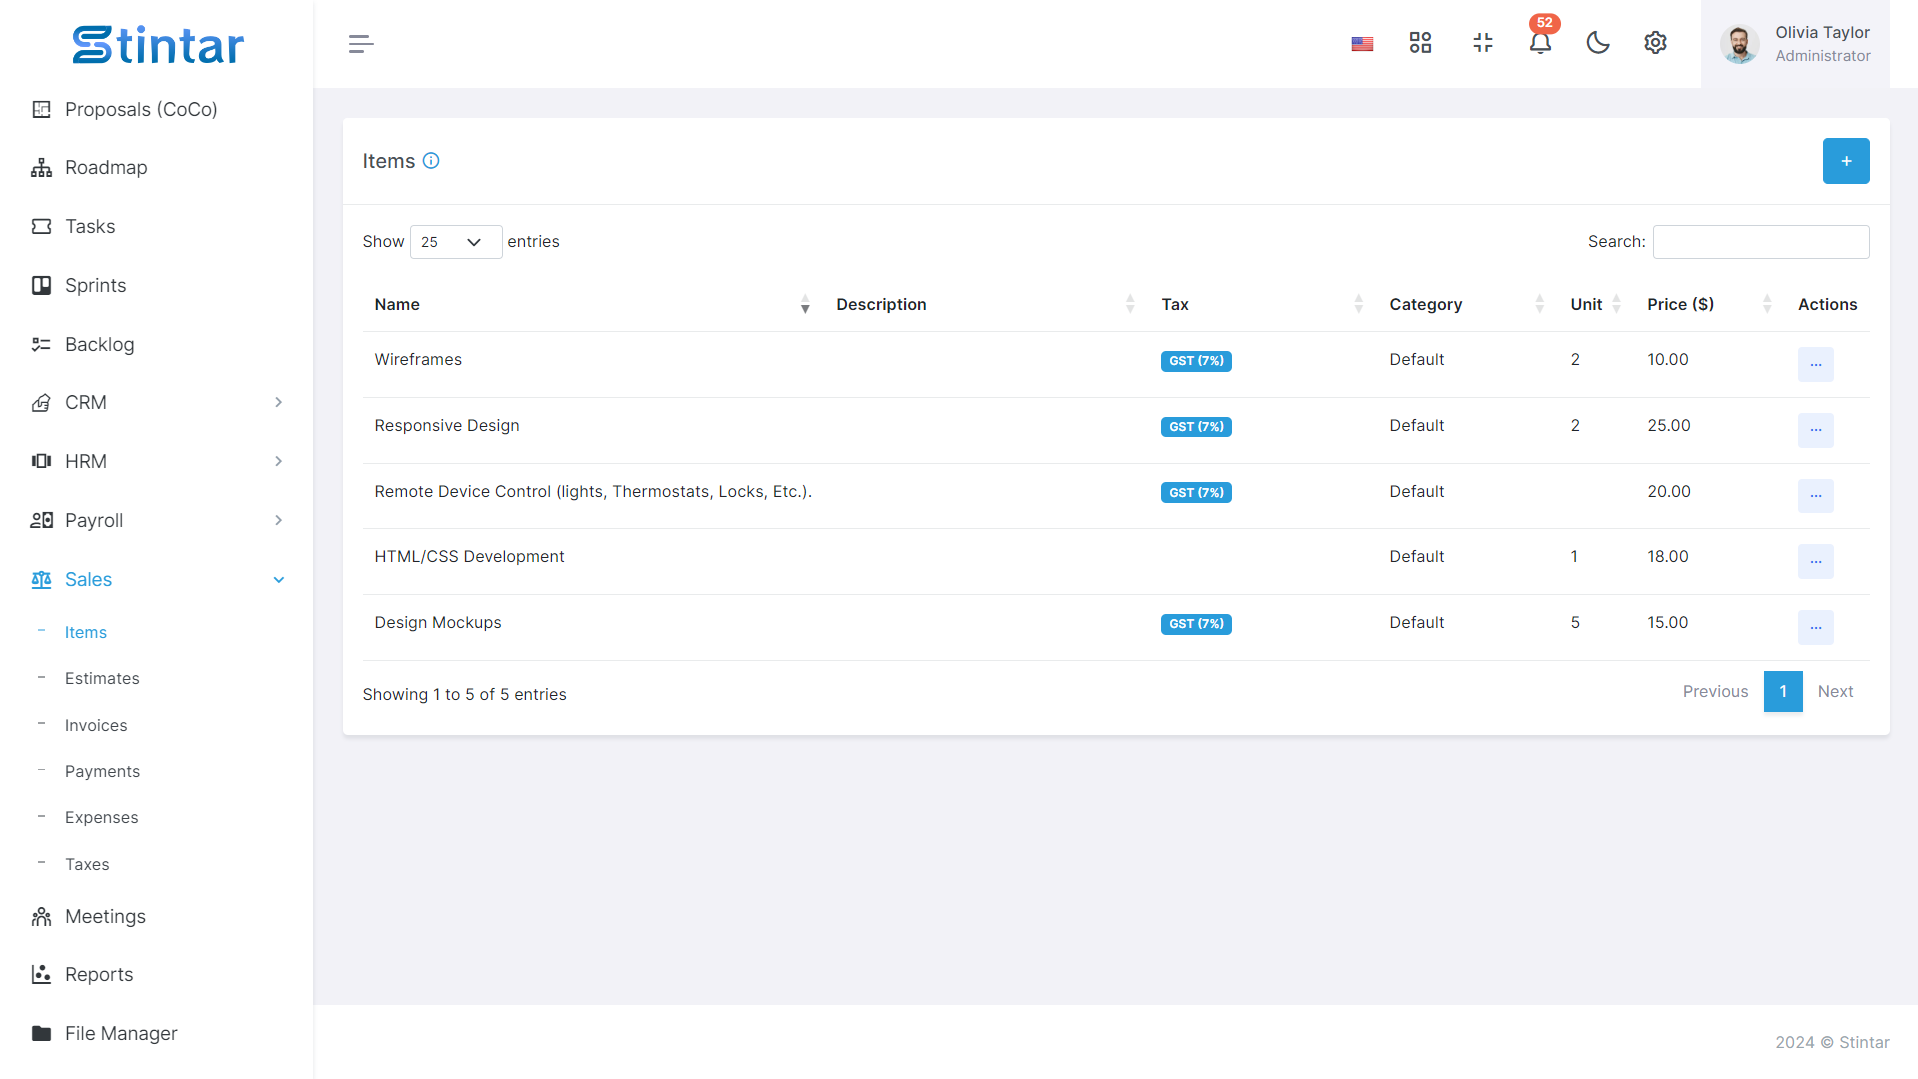
Accessing the Items Section
Navigate to the sales module of your system.
Locate the items section in the left sidebar or menu.
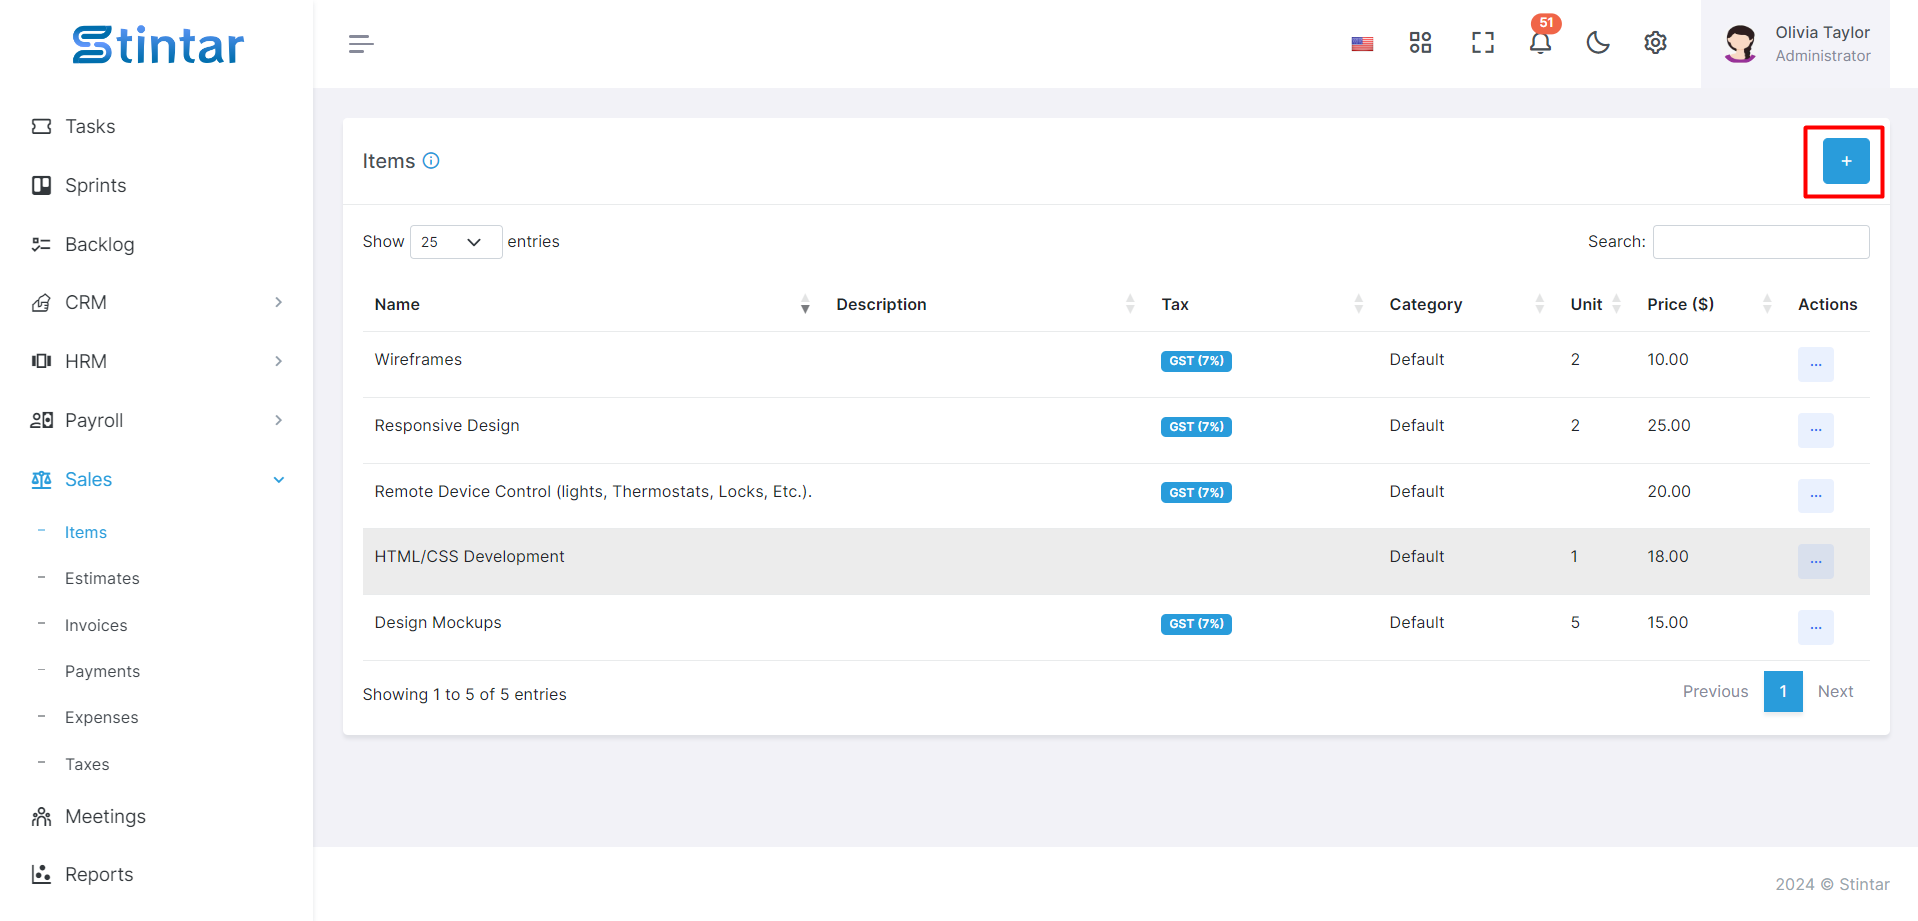
Initiating Item Creation
Once in the items section, look for the "+ Create" button or a similar option to begin the item creation process.
Click on the button to open the item creation form.
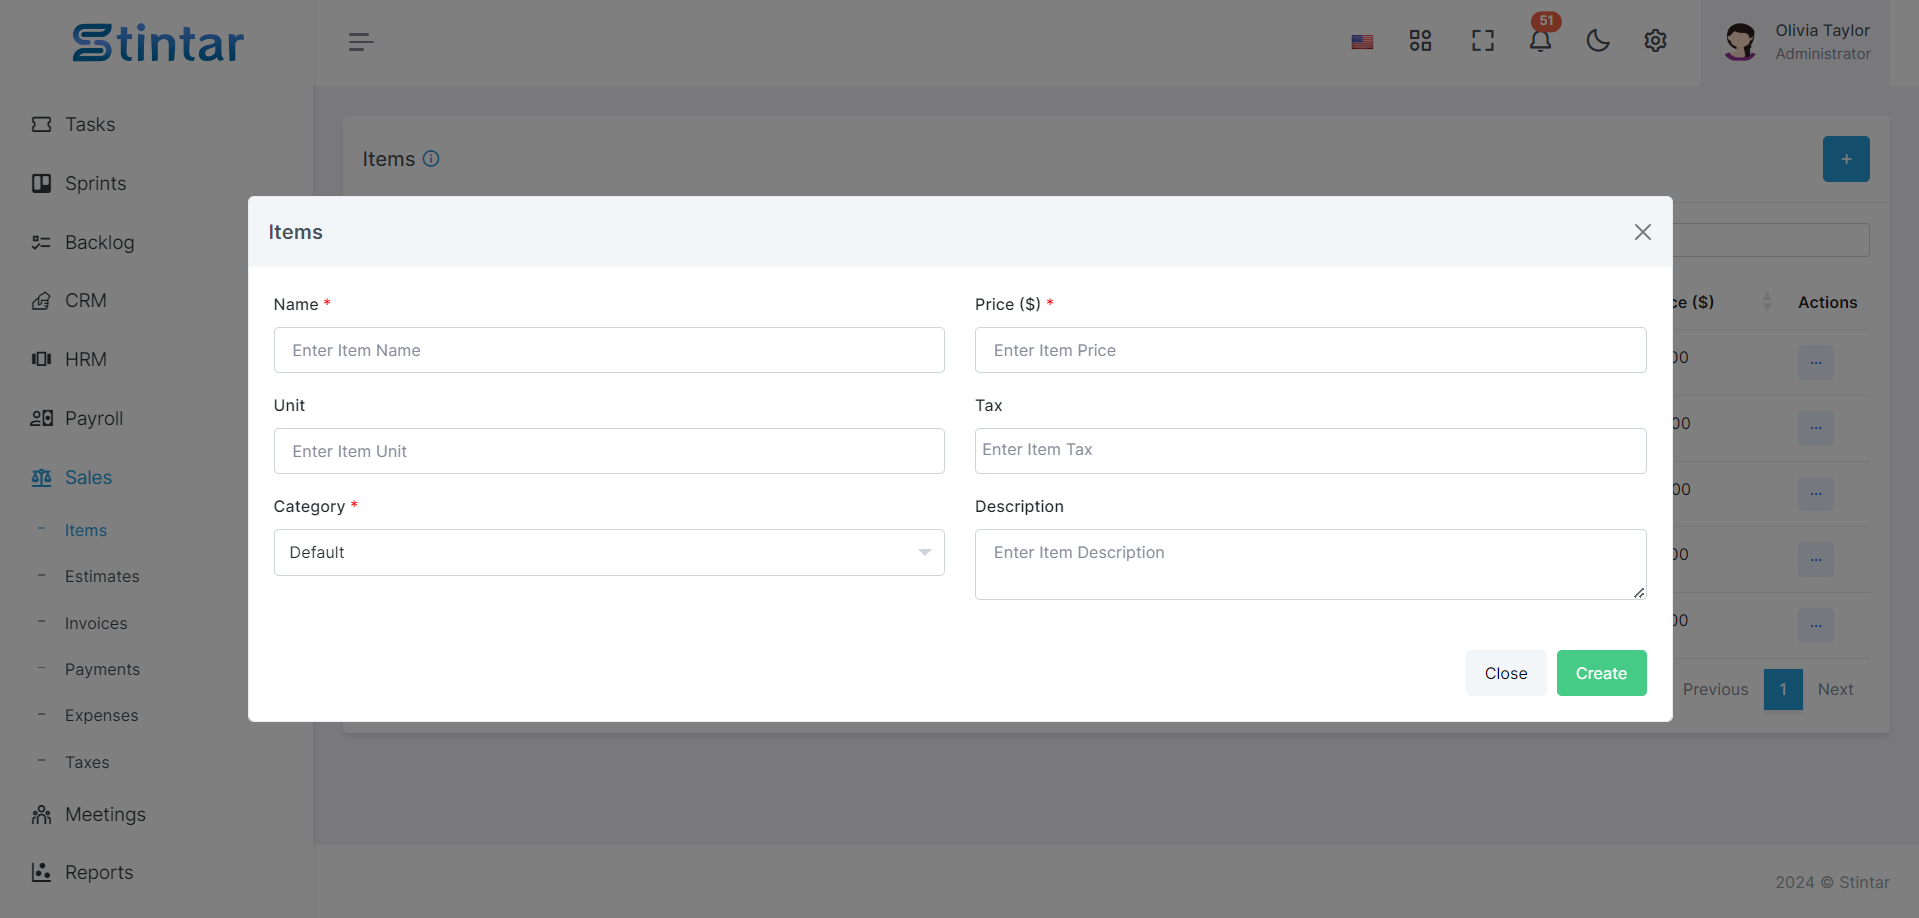
Item Creation Form

Name
Enter the name of the item you wish to create.
Price
Specify the price at which the item will be sold.
Unit
Indicate the number of services you provide (e.g., design, UI changes, development).
Tax
If applicable, select the tax category or rate for the item.
You can add the tax in Tax module
Category
Assign the item to a relevant category for organizational purposes.
You can create Item categories from the settings module.
Description
Provide a brief description or details about the item for reference.
Saving and Reviewing
Once you have filled out all the necessary fields in the item creation form, review the information for accuracy.
Save the item by clicking on the "Create" button.
Your newly created item will now be added to your inventory.
Managing Items
After creating items, you can view the complete list of items on the items listing page within the sales module.
From the items listing, you can easily edit or delete items as needed to maintain an up-to-date inventory.
By following these simple steps, you can efficiently create and manage items within your sales module. This process empowers you to maintain accurate inventory records and streamline your sales operations for enhanced productivity and customer satisfaction.