How To Create A Campaign?
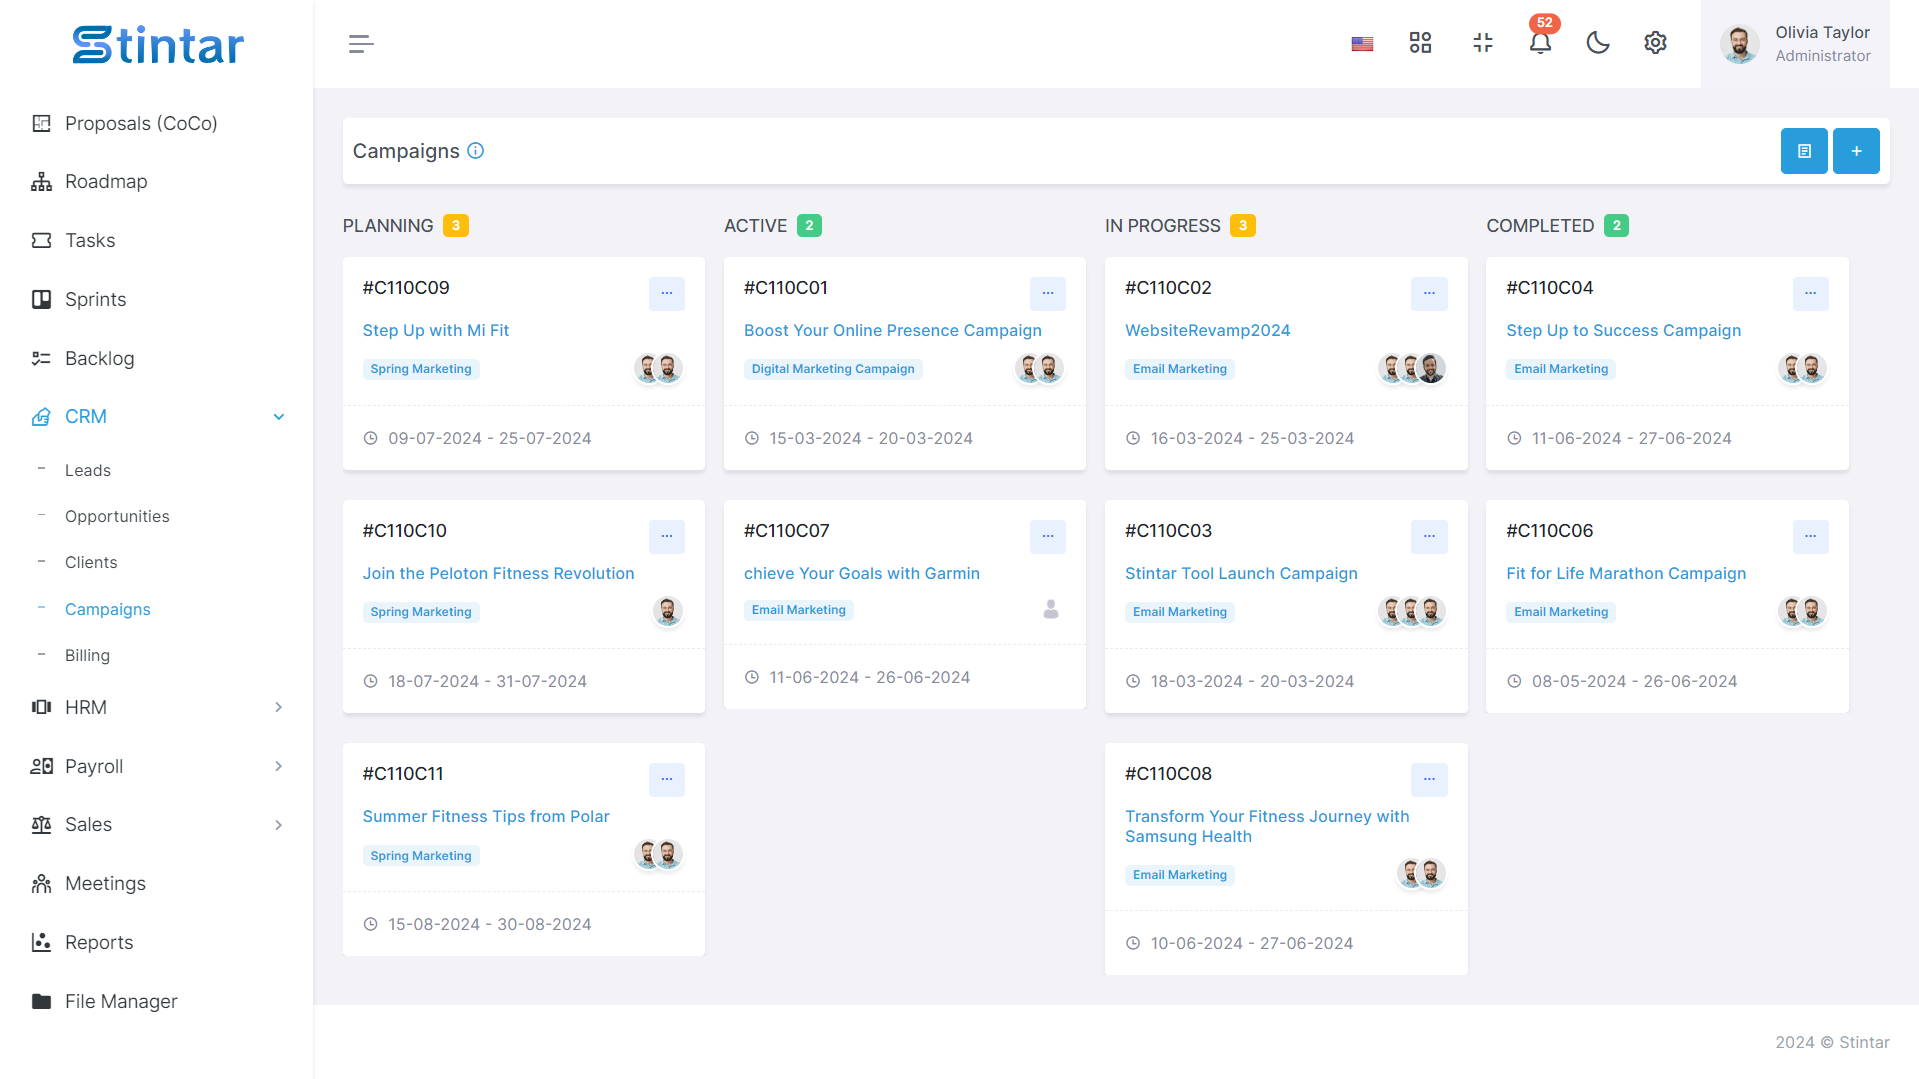
Creating a campaign involves a systematic process to ensure effective campaign management. Here's a step-by-step guide on how to create a campaign using Stintar:
How to Create A Campaign?
To create a campaign, first of all you need a campaign list, customer group and campaign type. Having these three components set up in advance provides a structured foundation for creating and managing your campaigns effectively in Stintar. Once these are established, you can proceed to create a campaign with the information gathered from the Campaign List, Customer Group, and Campaign Type. Let's go through the essential components needed to create a campaign:
Campaign List
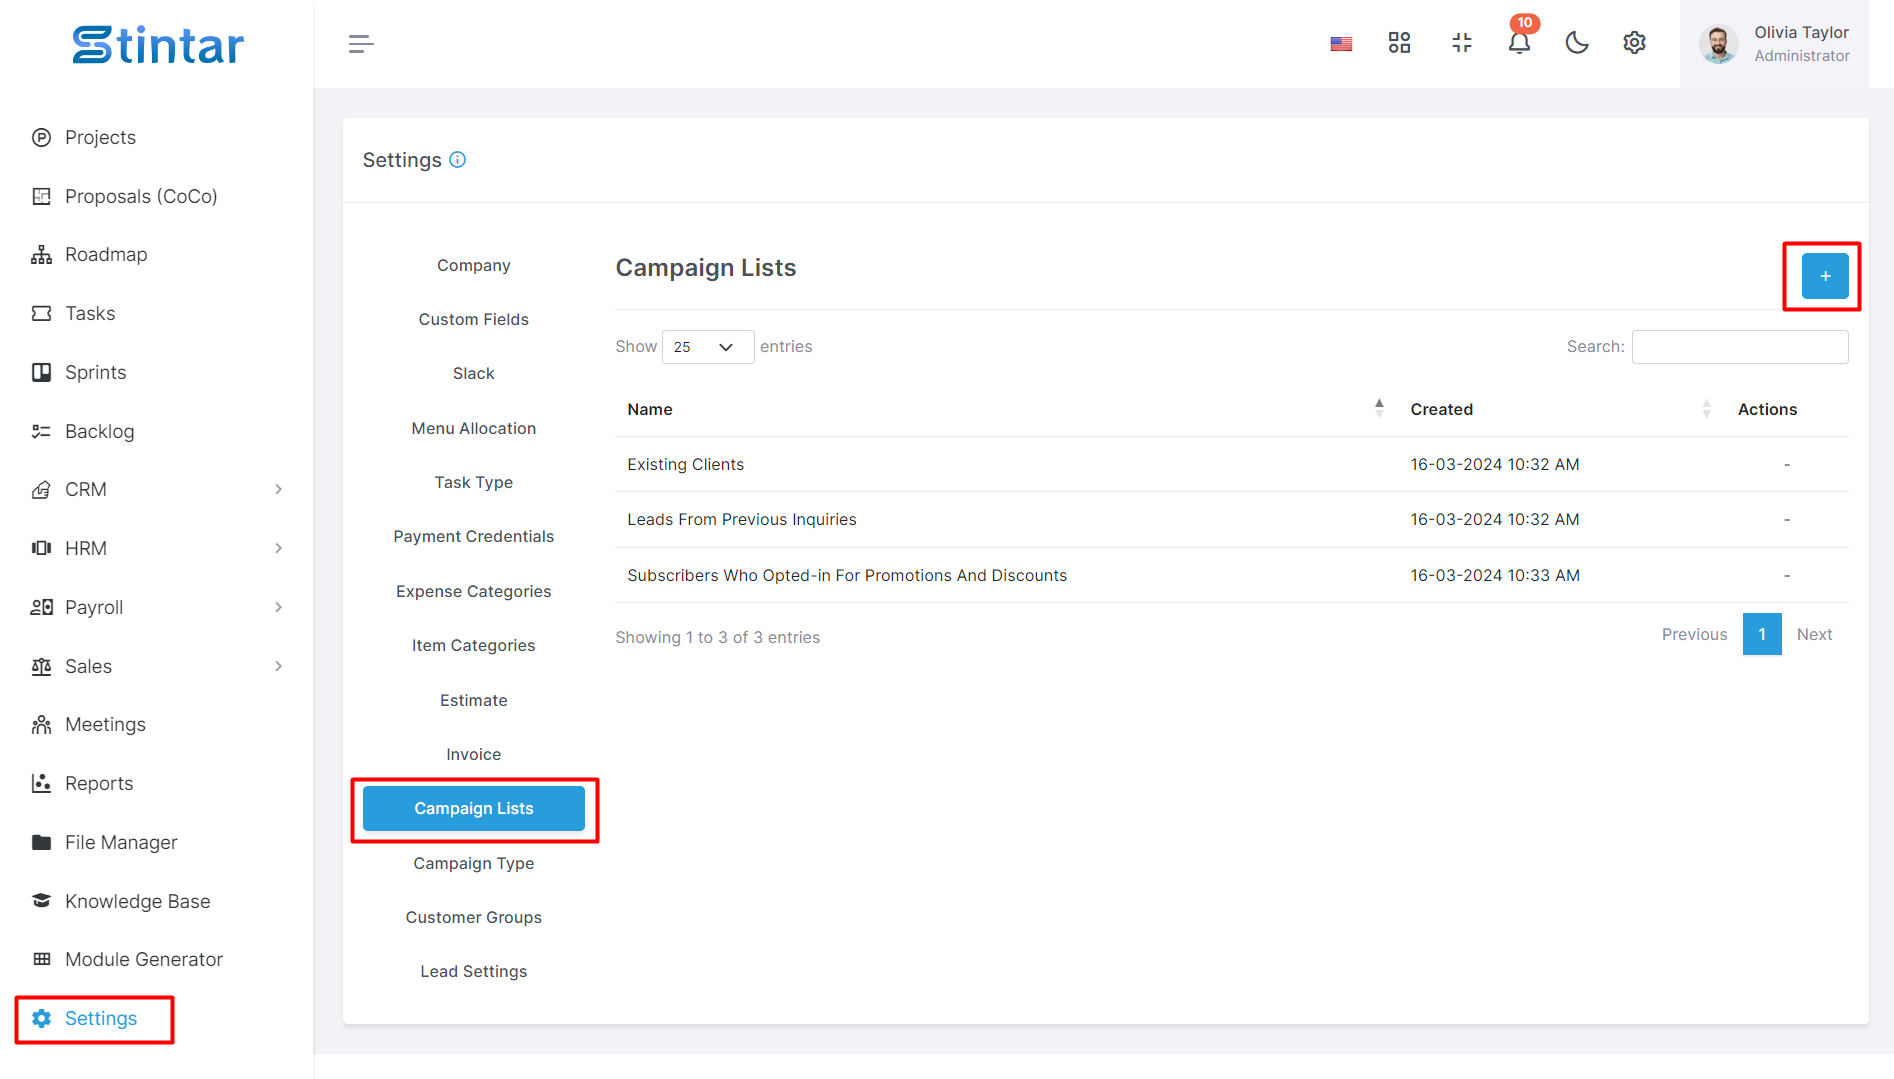
Navigate to the Settings Module in Stintar.
Locate the Campaign List option.
Add the name of the campaign list.
Customer Group
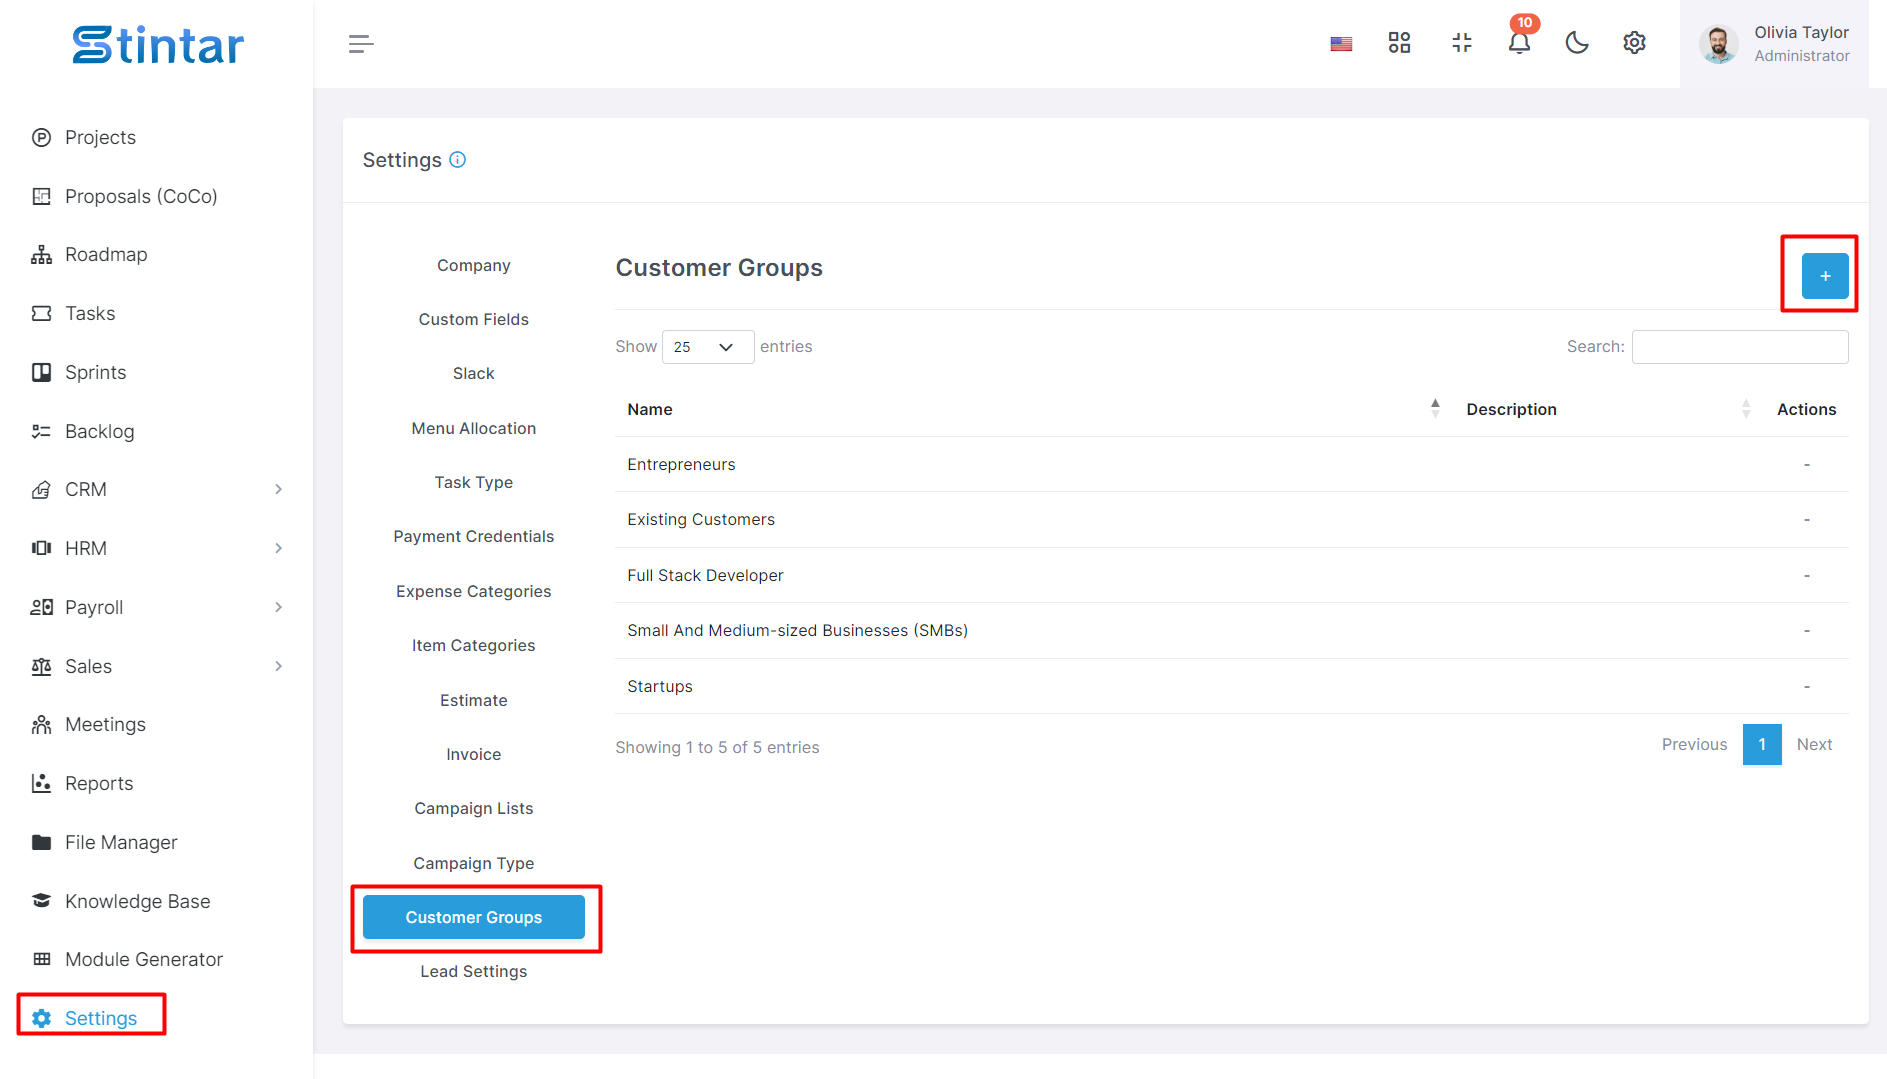
In the Settings Module, find the Customer Group option.
Add the name and description of the customer group.
Campaign Type
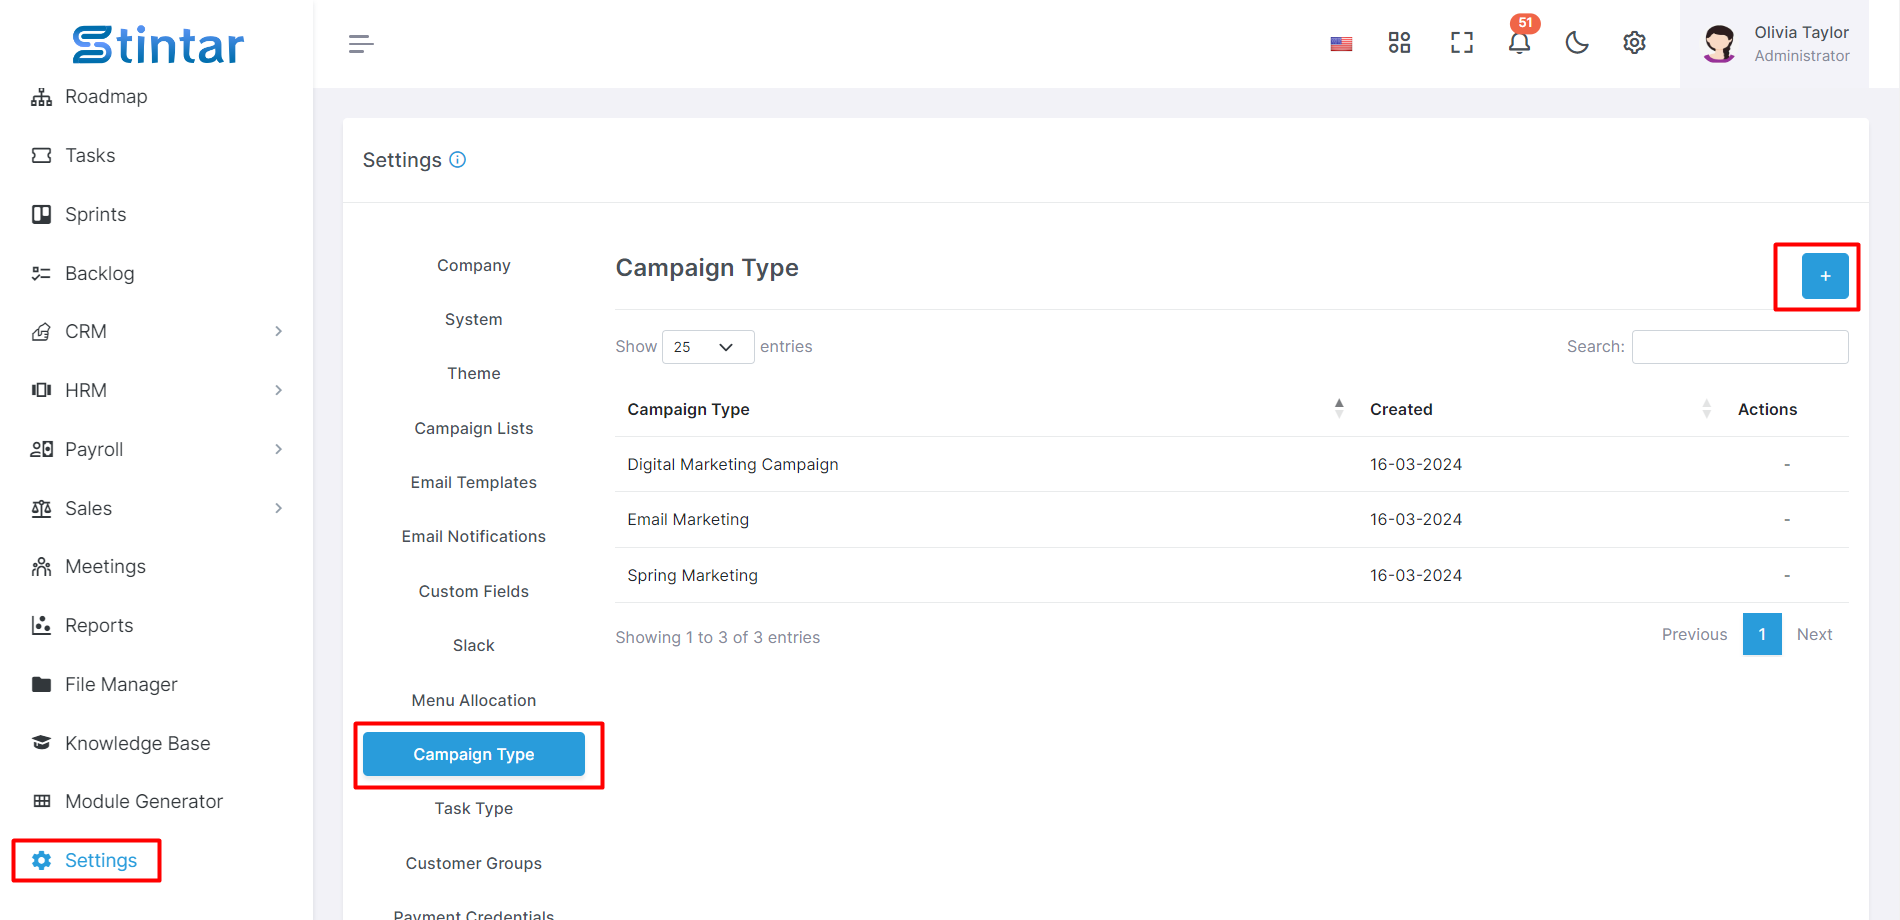
Within the Settings Module, find the Campaign Type option.
Add the name of the campaign type.
Create Campaign
Stintar provides a simple interface for manual campaign creation.
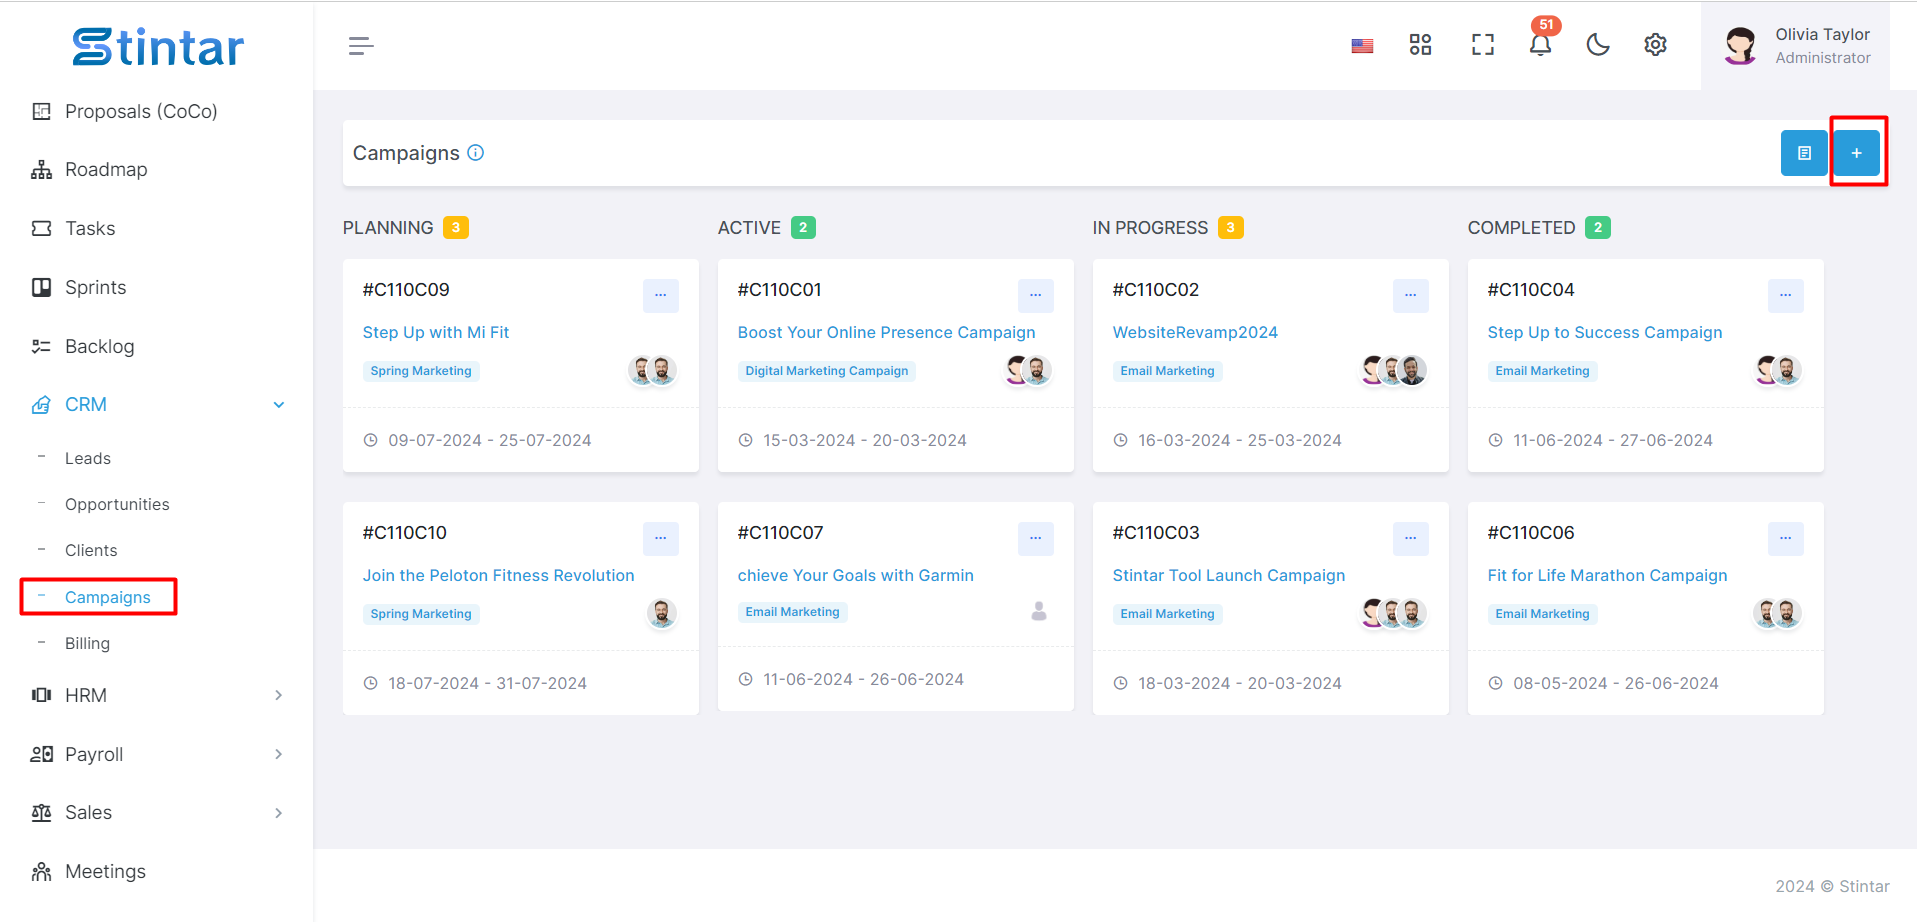
Access the Campaign Module
You can use the left sidebar of the screen.
Click on the “Campaign module in CRM Module To open a Campaign listing.
Initiate Campaign Creation
Within the campaign page, find the "+Create" button.
Clicking on this button will lead you to a dedicated page for creating a campaign lead.
Campaign Creation Form
This form is designed to capture essential details for effective Campaign management.
Campaign Creation Form
Here you can see Campaign creation form and Fill in the required details for the campaign and before that you will need the campaign list, campaign type and customer group data filled in the settings module.
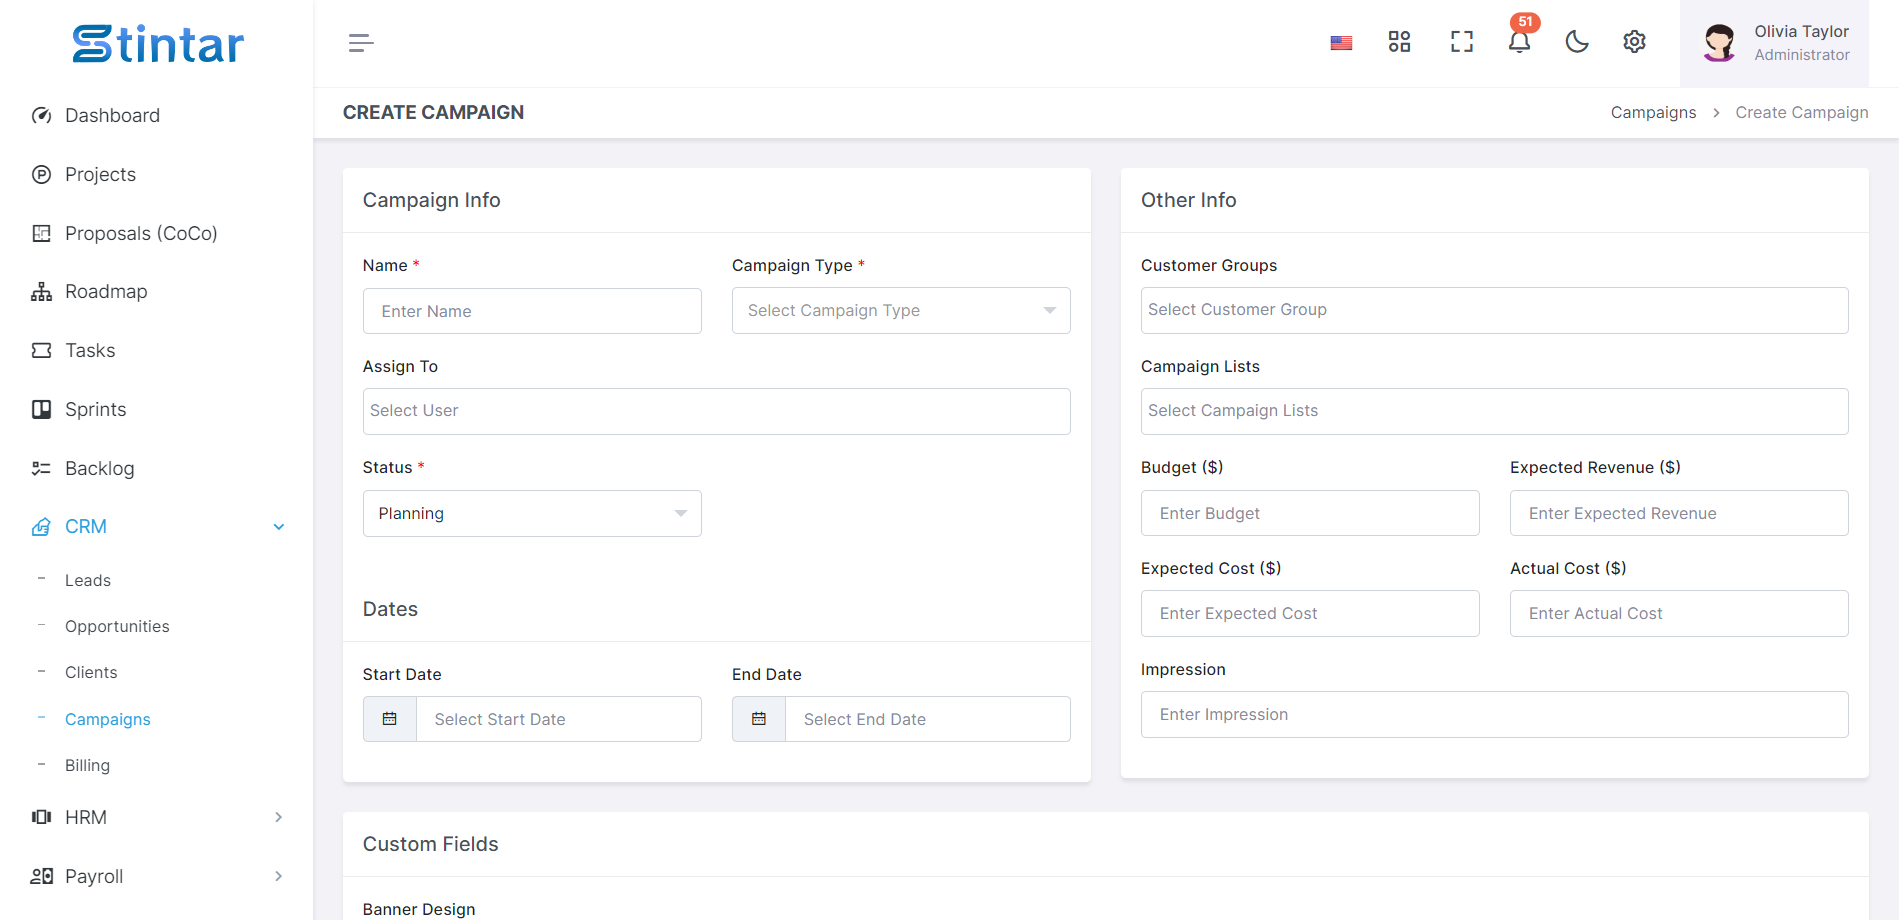
Name
Enter a distinctive name for your campaign to easily identify it.
Campaign Type:
Choose the type of campaign from the options available. This categorization helps in better organization.
Assign To
Specify the team or individual responsible for managing and executing the campaign.
Status
Set the current status of the campaign, whether it's in the planning phase, active, in progress, or completed.
Start date & End Date
Define the duration of the campaign by selecting the start and end dates. This provides a timeline for your marketing efforts.
Customer Group
Select the targeted customer group for this campaign. This ensures that your marketing efforts are directed towards the right audience.
Campaign List
Choose the specific campaign list that you created in the Settings Module. This list helps in organizing and tracking your campaigns.
Budget
Set the allocated budget for the campaign. This ensures financial planning and control for your marketing activities.
Expected Revenue
Estimate the potential revenue that the campaign is expected to generate. This helps in evaluating the campaign's success.
Expected Cost
Project the expected cost associated with running the campaign. This is crucial for budgeting and assessing ROI.
Actual Cost
Enter the actual costs incurred during the campaign. This helps in comparing planned versus actual expenses.
Impression
Track the number of impressions or views your campaign receives. This is particularly relevant for assessing the reach and impact of your marketing efforts.
Description
Provide a brief description of the campaign, outlining its goals, objectives, and key strategies.
Mail
Configure email settings for the campaign, including the subject and description. This is useful for email marketing campaigns.
Campaign View
After creating the campaign, you can view it in different formats:
Kanban View
List View